Homemade Cherry Pie
This post may contain affiliate links. Please read the disclosure policy.
This Cherry Pie has a light, flakey crust with a homemade filling made from scratch using fresh cherries. Serve it with ice cream or whipped cream for a dreamy dessert everyone will love!
Can you resist tart cherry pie filling wrapped in flakey homemade pastry? It’s one of my all-time favorites along with our popular Cherry Pull Apart Pie and Mini Cherry Pies.
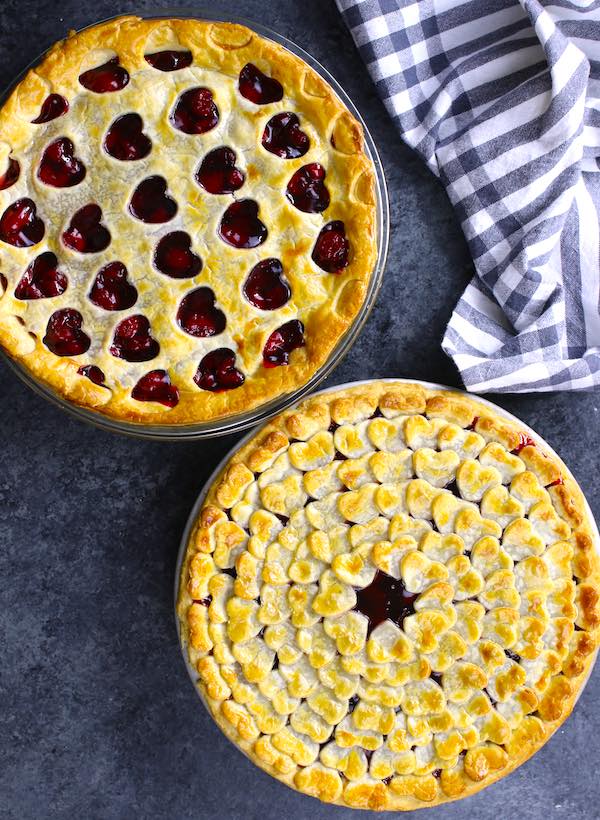
In addition to everyday indulgences, we’ve made this cherry pie recipe for Valentine’s Day and Mother’s Day with rave reviews! A small heart-shaped cookie cutter helps to create a beautiful pattern on top. As easy as pie!
How to Make Cherry Pie
While you can easily make this recipe using storebought pie crust and canned filling, there’s nothing like the taste of homemade:
1. Make the Pie Crust
To make the pie crust, combine flour and salt in a large bowl. Add cold unsalted butter cubes and mix with a pastry cutter or two forks until you have a coarse mixture. Then add ice water until moist clumps form.
Make the mixture into a ball and divide into two rounds. Refrigerate for several hours before rolling out.
2. Make the Filling
Pit Cherries: If you don’t own a cherry pitter, you can use a trick using an empty beer bottle and a chopstick:
- Place the washed cherry on top of an empty beer bottle (or water bottle, wine bottle, etc). The stem faces down.
- Use a chopstick to push down in the center of the cherry
- The pit will pop out into the bottle
Make the filling: Add the pitted cherries to a saucepan over medium heat. Cook for a few minutes until juice starts coming out. Then add sugar and cornstarch to the saucepan and stir. Mix well. Add lemon juice, vanilla extract and almond extract to intensify the flavor. Cook until thickened, stirring constantly. Remove from the heat and let cool. (If the filling is too thick, you can add more water, if it’s too thin, add more cornstarch)
3. Add Cherry Filing to Pie Dough
- Butter the pie plate and transfer the rolled out dough to the plate. Gently press the dough into the bottom and side of the plate.
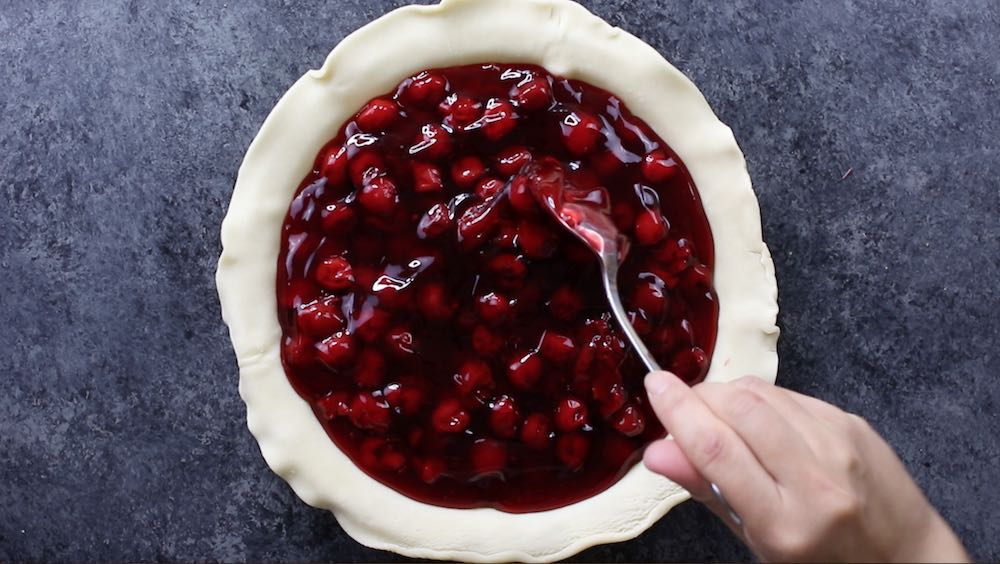
- Add cooled cherry filling to the pie plate on top of pie dough.
- Arrange heart-shaped lattice: Roll out another dough disk. Use a cookie cutter to make heart-shaped holes in the dough (watch video for guidance)
- Place the second piece of dough with “hearts” on top of cherry fillings.
- Seal edges and trim extra.
- Cover the plate with plastic wrap and chill for at least 30 minutes to overnight.
4. Bake
- Preheat the oven to 400°F.
- Brush the top crust with egg wash to give the crust a golden and glossy sheen after baking.
- Bake for 20 minutes uncovered, and another 15 to 20 minutes covered with aluminum foil.
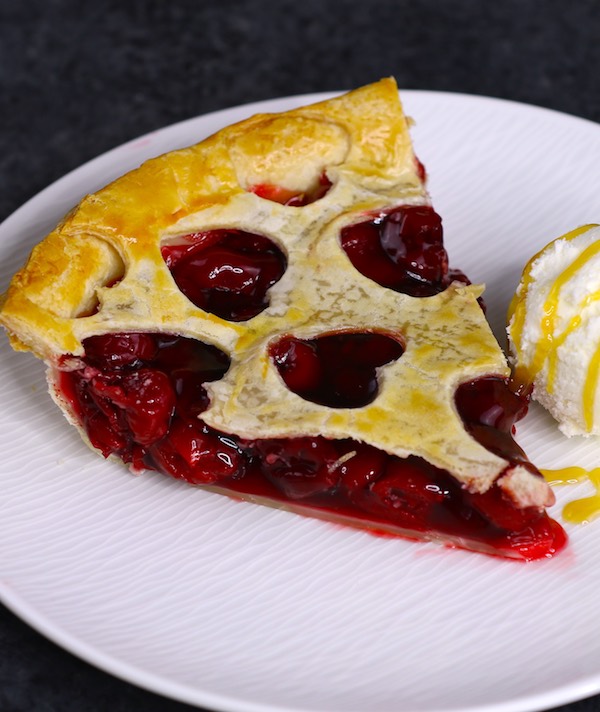
- Serve with ice cream and enjoy!
How to Serve Cherry Pie
Make sure to let your cherry pie to cool completely (at least 2 hours) before slicing. Otherwise, it tends to fall apart easily. Best to serve with ice cream.
Watch How To Make Cherry Pie:
More cherry desserts:
View all desserts
Cherry Pie Recipe (with Video)
Ingredients
Crust
- 2 1/2 cups all-purpose flour
- 1/2 tsp salt
- 1 cup unsalted butter, chilled and diced
- 4 - 8 tbsp ice water
Filling
- 2 pounds unpitted sweet cherries, 5 cups (see note)
- 2/3 cup granulated sugar
- 3 to 4 tbsp cornstarch, (see note)
- 1 tbsp fresh lemon juice
- 1/2 tsp vanilla extract
- 1/4 tsp almond extract
- 1 tbsp unsalted butter, cut into small cubes
- egg wash, 1 large egg + 1 tablespoon water, mix well
- vanilla ice cream
Instructions
Pie Crust
- In a large bowl, add all-purpose flour and salt, then mix well.
- Cut the cold butter into small cubes and add into the bowl. Mix until the mixture resembles coarse crumbs.
- Add ice water gradually to form moist clumps (best to add 1 tablespoon at a time).
- Transfer dough mixture onto a dry board sprinkled with flour. Use the heel of your hand and smear the dough little by little across the board.
- Make the dough into a ball, and divide in half. Form each into a ball, and then flatten into rounds. Wrap separately in plastic or place in zip-lock bags. Refrigerate for 4 hours or overnight.
- Flour a work surface. Remove one round from fridge and roll it out to about 12 inches across using a rolling pin.
- Butter the pie plate and transfer the pie dough to the plate, pressing the bottom and edges into place.
Cherry Pie Filling
- Add pitted cherries to a medium saucepan over medium heat. Cook for a few minutes until you see juice coming out of cherries.
- Add sugar and cornstarch to the saucepan and stir. Mix well.
- Add lemon juice, vanilla extract and almond extract. Stir and cook until thickened.
- Taste test and add more sugar or lemon juice according to your preference.
- Remove from the heat and let cool. If the filling is too thick, you can add more water, if it’s too thin, add more cornstarch.
Baking
- Preheat the oven to 400°F. Meanwhile assemble the pie.
- Add the cool cherry pie filling to the pie crust.
- To add a top crust, roll out a second round of dough on a floured work surface. Cut small hearts using a heart-shaped cookie cutter (see video).
- Seal and trim the edges using a fork.
- Bake for 20 minutes uncovered or the edges become lightly golden. Cover loosely with aluminum foil and bake 15-20 minutes more.
- Allow to cool for at least one hour before serving. Enjoy!
Notes
- If you want to save time, use refrigerated pie crusts instead of homemade crusts, and canned cherry pie filling instead of homemade filling.
- Choosing the Right Cherries: There are two varieties in supermarkets: sweet cherries (fresh or frozen) and sour cherries (usually frozen). I used dark sweet cherries since they're most widely available; however sour cherries have traditionally been considered pie cherries for their tart flavor. If you use them, use less lemon juice and more sugar.
- You should adjust amount of cornstarch based on the juiciness of your filling. Simply add only enough cornstarch until your filling is neither too soupy or too thick. Note: A runny filling will firm up when cool.
- Leftover pie dough: Store it in the fridge for up to 3 days for use in other recipes or wrap it tightly and freeze for up to 3 months.
- Leftover filling: Can be stored for up to 3 days for use in other recipes such as Cherry Pull Apart Pie.
Please read our nutrition disclaimer.
Recipe tools
 |
 |
 |
© TIPBUZZ. Images and text on this website are copyright protected. Please do not post or republish without permission. If you want to republish this recipe, please link back to this post. This post may contain affiliate links. Read the disclosure policy here.