Mini Cherry Pies
This post may contain affiliate links. Please read the disclosure policy.
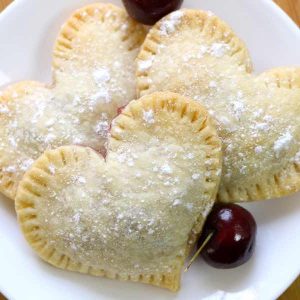
These Mini Cherry Pies are flaky, sweet and delicious with a beautiful heart shape. They’re perfect for Valentine’s Day, Mother’s Day or any special occasion!
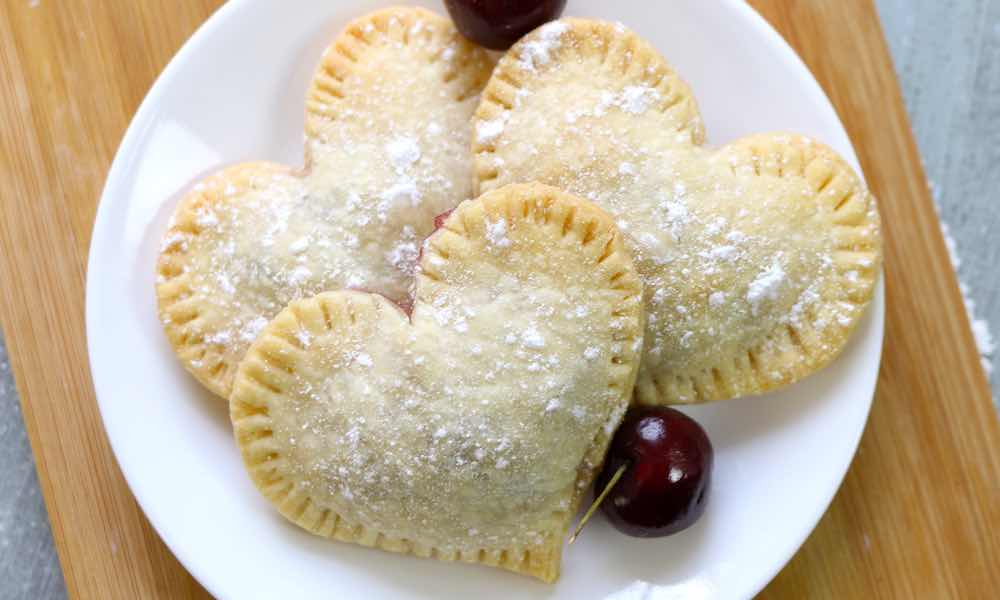
When you’re looking for a fun pie recipe, these mini cherry pies are absolutely luscious. We’ve used an easy homemade cherry pie filling in the middle for a burst of fruit flavor. Serve them on their own for dessert or combine with whipped cream or ice cream!
This recipe is a smaller version of classic cherry pie. If you want a bite-size variation, try our cherry pull apart pie.
How to Make Mini Cherry Pies
To make them, you’ll need a baking sheet and a heart-shape cookie cutter. I recommend a 3.75 or 4 inch size, but you can go slightly smaller or larger if that’s what you have.
They’re super-easy to make using refrigerated pie crusts (I used Pillsbury but any brand will do). If you want to make it from scratch, follow our homemade pie crust recipe.
Watch Recipe Video
Mini Cherry Pies
Ingredients
- 2 pie crusts, I used Pillsbury but you can also make your own pie crust
- 1/2 cup fresh cherries, pitted and chopped
- 1/2 cup ricotta cheese
- 1 tbsp unsalted butter, melted
- 1 tsp sugar
- powdered sugar, for serving
Instructions
- Preheat the oven to 375°F. Line a baking sheet with parchment paper or a nonstick baking mat and set aside.
- On a work surface, roll out the first pie dough on a work surface to about 1/8-inch thickness. Use a heart shaped cookie cutter to form 6-8 heart shapes. Arrange the heart cutouts on the baking sheet.
- Repeat the cutouts with the second pie crust and add to the baking sheet to make 12-16 in total.
- In a small bowl, mix the chopped cherries and sugar.
- Add a tablespoon each of ricotta cheese and the cherry mixture onto half of the heart shapes. Place the remaining hearts on top and seal the edges tightly with your fingers.
- Brush the tops with melted butter and bake for 18-22 minutes or until flakey and golden.
- Remove from oven and allow to cool for 10 minutes. Dust with powdered sugar before serving.
Please read our nutrition disclaimer.
Recipe Tools:
© TIPBUZZ. Images and text on this website are copyright protected. Please do not post or republish without permission. If you want to republish this recipe, please link back to this post. This post may contain affiliate links. Read the disclosure policy here.