Perfectly Flaky Pie Crust
This post may contain affiliate links. Please read the disclosure policy.
This Homemade Pie Crust is flaky, light, buttery and full of flavor. So much better than store-bought frozen or refrigerated pie crusts, and you can use it for both sweet and savory pies. The best part? Only 3 ingredients to make it!
I love pies and my favorite pie recipes include Cherry Pie, Nutella Pie, Apple Pie Fries and Blueberry Pie Ice Cream Sandwiches. This Pie Crust recipe works with most pie filings and and can be easily made by hands with just a few simple ingredients.
Ingredients for Pie Crust
The classic Pie Crust recipe only calls for 4 ingredients: Flour, Salt, Butter (or other fat) and Water. The basic 4 ingredients can make the best flaky and delicious pie crust as long as you follow the instructions properly.
How to Make a Perfect Pie Crust?
Step 1: Mix Dry Ingredients
Start with adding all-purpose flour and salt and a large bowl, then mix well.
Step 2: Cut in Butter
Make sure to use unsalted butter. Cut the butter into small cubes and add into the bowl. Mix until the mixture resembles coarse crumbs.
Note: It’s important to keep the butter cold. One option is to freeze the block of butter, grate it ahead of time and re-freeze until use. Or you can simply use a dough blender to work quickly before it warms up too much.
Step 3: Add Water
Add ice water gradually (1 tablespoon at a time) to form moist clumps. If the dough is still too crumbly, add more ice water. In most cases 4 to 6 tablespoons will be enough, but if you are living in a very dry environment, you can add up to 8 tablespoons of water.
This is the most challenging step as less water makes the pie light and flaky, but it’s difficult to work with. Adding more water makes it easier to mix and roll, but the texture will be inferior. So the right amount of water is a key.
How to Tell When There is Enough Water: Gather the mixture in your hand and squeeze it. If it just barely begins to hold together, that means it’s ready. Otherwise, add more ice water.
Once ready, transfer the dough mixture from the bowl or food processor onto a dry board sprinkled with flour.
Step 4: Make the Perfect Dough – Using French Technique Fraisage
The secret to getting a flaky pie crust is a French technique called fraisage. It involves pulling one-inch chunks of dough away from the mass, and then smearing them together little-by-little on a floured work surface with the heel of your hand.
The purpose is to flatten the pieces of butter into layers so that, when the crust bakes, the moisture in the butter turns into steam and expands to form pockets in the dough, producing a flaky crust.
Fraisage also distributes the butter more evenly, avoiding clumps of butter from potentially melting in the dough. Just don’t over-do it. You’ll see small chunks of butter speckling the dough, which is normal.
Step 5: Chill the Dough
Make the dough into a ball after fraisage and divide in half. Form each into a ball, and then flatten them into rounds. Wrap them separately in plastic or place them in zip-lock bags. Refrigerate for 4 hours or overnight.
Step 6: Roll out the Dough and Transfer to a Pie Plate
After the dough is chilled, remove one round from fridge and let it sit at room temperature for 5 minutes so that it’s softened enough to be rolled out.
Roll it on a floured surface using a rolling pin. Start from the center of the dough and roll outwards moving clockwise. Roll it out to a size that fits your pie plate.
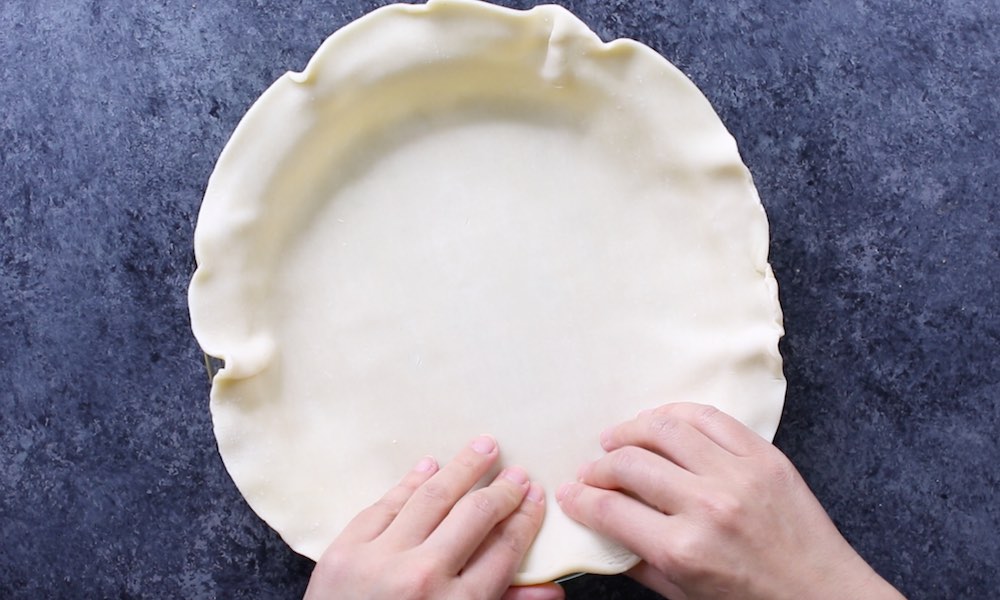
Butter the pie plate before transferring the dough to the plate. When the plate is ready, wrap the rolled out dough around the rolling pin and transfer to the plate. Unroll it, and gently press the dough into bottom and side of plate.
Cover the plate with plastic wrap and chill for at least 30 minutes. This is an important step before baking, otherwise, the crust can slip down the sides during baking.
Step 7: Trim the Edges
Single Crust Pie: Use scissors to trim the dough to within ½ inch of the lip of your pie plate. Fold the extra underneath itself along the edge of the plate. Seal to form a rim.
Double Crust Pie: After adding the filling in the pie, roll out the second disk of dough, and place on top of the filing. Use scissors to trim the overhang to ½ to 1 inch over. Fold the top piece under the bottom piece along edges and press together. Then press against the edges of the pie with your fingers.
Use a knife to cut into the middle of top layer, so that the steam can escape during baking. Then brush with egg wash and bake.
Step 9: Bake
There are usually two ways to bake your pie: with or without filling. It depends on whether your filling needs to be baked or not. For example, some filings such as pumpkin, cherry or apple filings need to be baked, while others such as chocolate cream, etc. don’t need to be baked.
Baking Unfilled Pie Crust (Blind Baking): Preheat the oven to 400 F. Line the chilled crust with parchment paper, and then fill it with dried beans, rice or pie weights. Bake it for 20 minutes, and then remove the parchment paper. Use a fork and prick the bottom and sides of the dough. Bake another 10 to 20 minutes until it’s golden brown. Remove it from oven, let it cool completely before add the filing.
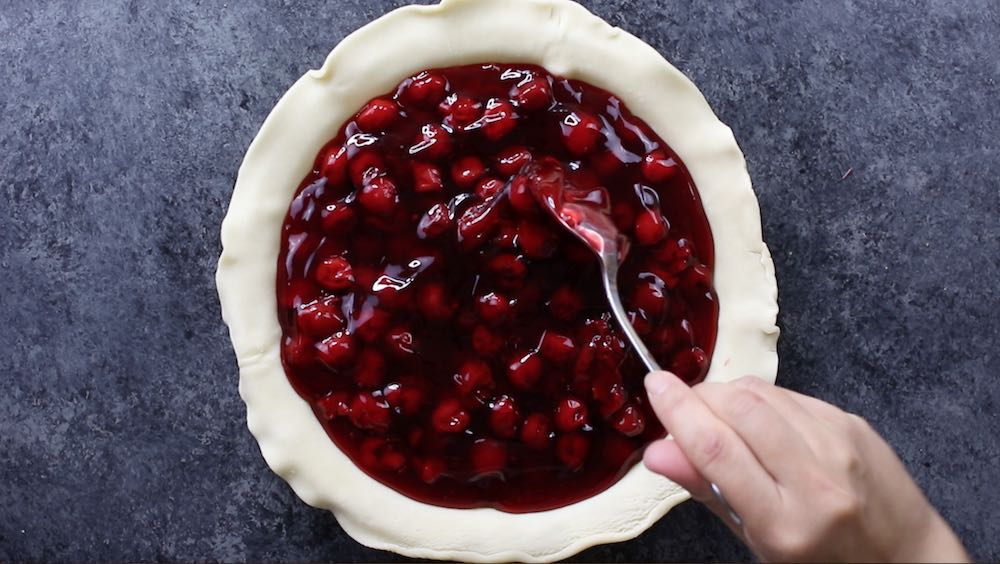
Bake Filled Pie: Fill pie crust with pie filling and bake for 20 minutes uncovered and another 20 minutes covered with aluminum foil.
Note: this instruction will make enough dough for two 9-inch single-crust pies or one double crust pie. For one single crust pie, you need to cut all ingredients in half.
How Long Can I Store Freshly Made Pie Dough?
This homemade pie dough can be stored in refrigerator for up to 2 days or in freezer for up to 3 months. Thaw in fridge before rolling.
Pie Fats: Butter, Shortening, Lard or Vegetable Oil
My favorite fat for this pie crust recipe is butter, and it always makes the perfect flavorful and flaky pie.
Shortening and Lard are easier to work with, and makes nice and flaky pies as well, but not as flavorful or as healthy as butter.
Vegetable oil is easy to mix with the dough, but it’s very difficult to get the flaky texture you want.
You can also use a combination of fats such as butter and shortening where you can get the flavor from butter and the extra flakiness from shortening.
Tips and Secrets for Making a Perfect Pie Crust
- Keep everything cold. Cut the cold butter into cubes. You can place them in the freezer for 10 to 15 minutes before using it.
- Use ice water and add it little by little. Too much water will make the crust tough and soggy. Pinch the mixture in your hand, and if it just barely begins to hold, it means it’s ready and don’t need more water.
- Don’t use processor to mix in water. It’s easier to control the amount of water by using hands.
- After placing the dough into the pie plate, chill it for 30 minutes before baking.
- This recipe doesn’t require food processor and you can easily use your hands to mix the ingredients

Pie Crust Recipe
Ingredients
- 2 1/2 cups all-purpose flour
- 1/2 tsp salt
- 1 cup unsalted butter, chilled and diced
- 4-8 tbsp ice water
- all-purpose flour, for the work surface
Instructions
- In a large bowl, mix together all-purpose flour and salt.
- Cut the butter into small cubes and add into the bowl. Mix with your fingers for a minute or two until the mixture resembles coarse crumbs.
- Add ice water 1 tablespoon at a time until the dough forms moist clumps.
- Make the dough into two balls, and then flatten each one into 1-inch thick rounds.
- Optional but recommended: Wrap them separately in plastic or place in zip-lock bags. Refrigerate for 4 hours or overnight.
- Remove one round from the fridge and let it sit at room temperature for 5 minutes so it’s softened enough to be rolled out.
- Sprinkle a few tablespoons of flour onto a large cutting boarding or work surface.
- Place the dough on the work surface and use the heel of your hand to flatten to about 1/2 inch.
- Using a rolling pin, roll clockwise from the center outwards until the dough is slightly larger than your pie plate, dusting periodically with extra flour.
- Slide a long knife or icing spatula under the dough to make sure it's not sticking, and place the pie plate next to the dough.
- Fold the edge of the dough over the top of the rolling pin. Then gently slide the dough from the work surface onto the pie plate.
- Center the dough and press into the bottom and edges of the plate.
- Using a sharp paring knife, cut along the edge of the plate to remove any excess dough. Use the excess to patch up holes or cracks in your dough.
- For an unfilled pie crust, preheat the oven to 400°F. Prick the dough a dozen times with a fork and fill with dried beans, rice or pie weights. Bake for 20-30 minutes until the edges are golden, and check it at 15 minutes.
- Remove from oven and cool completely before adding pie filing. Serve and enjoy!
Notes
Please read our nutrition disclaimer.
© TIPBUZZ. Images and text on this website are copyright protected. Please do not post or republish without permission. If you want to republish this recipe, please link back to this post. This post may contain affiliate links. Read the disclosure policy here.


Cold ingredients are so key here! Thanks for all the tips and techniques for the perfect pie crus – this is so helpful!!
Hi Jenn, Couldn’t agree more and thanks for your comment!