How to Make an Ice Bowl
This post may contain affiliate links. Please read the disclosure policy.
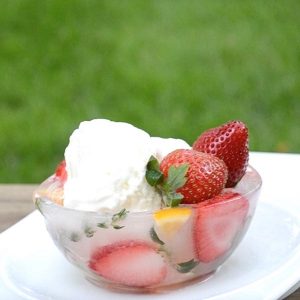
Learn how to make an ice bowl for your next party! It’s a stylish addition that will keep desserts cold longer. Plus, you can add colorful decorative accents like fresh herbs or edible flowers to customize. So fun!
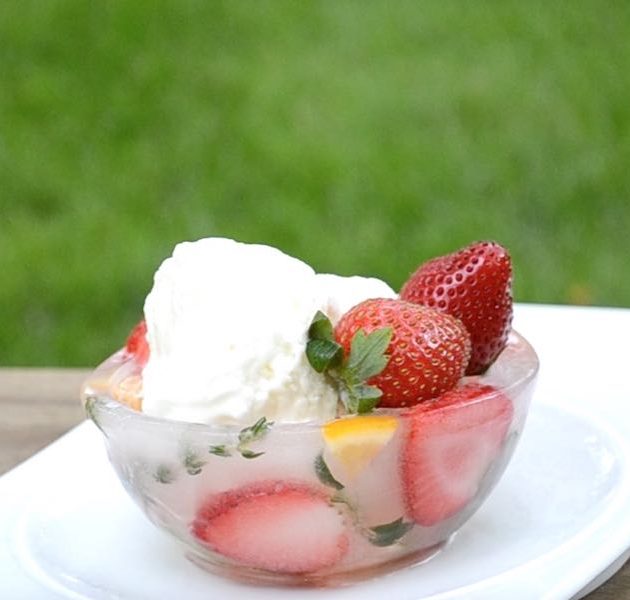
Make a big impression at your next party with an ice bowl! They are beautiful and functional, since the thick layer of ice will prevent ice cream or other frozen desserts from melting. Perfect for barbecues or celebrations requiring a special touch.
If you like making ice decorations, be sure to check out our holiday punch with ice ring too!
Ingredients and Equipment for an Ice Bowl
Here’s what you’ll need to make them:
- Concentric Bowls: I usually use a 1 quart glass mixing bowl and a 2 1/2 to 3 quart mixing bowl. Ideally you want a 1/2 to 3/4 inch gap in between.
- Rubber Bands: Grab a few stiff rubber bands to hold the bowls in place once the water goes in.
- Cold Water: It’s best to use distilled or filtered water to avoid getting cloudy ice. However, I don’t mind the cloudy look, so have used tap water successfully on occasion as well.
- Decorations: This is where you can get creative, adding anything from citrus slices to fresh herbs to the ice as accents. I also use fresh strawberry slices when the bowl will be used within a day or two.
How to Make an Ice Bowl
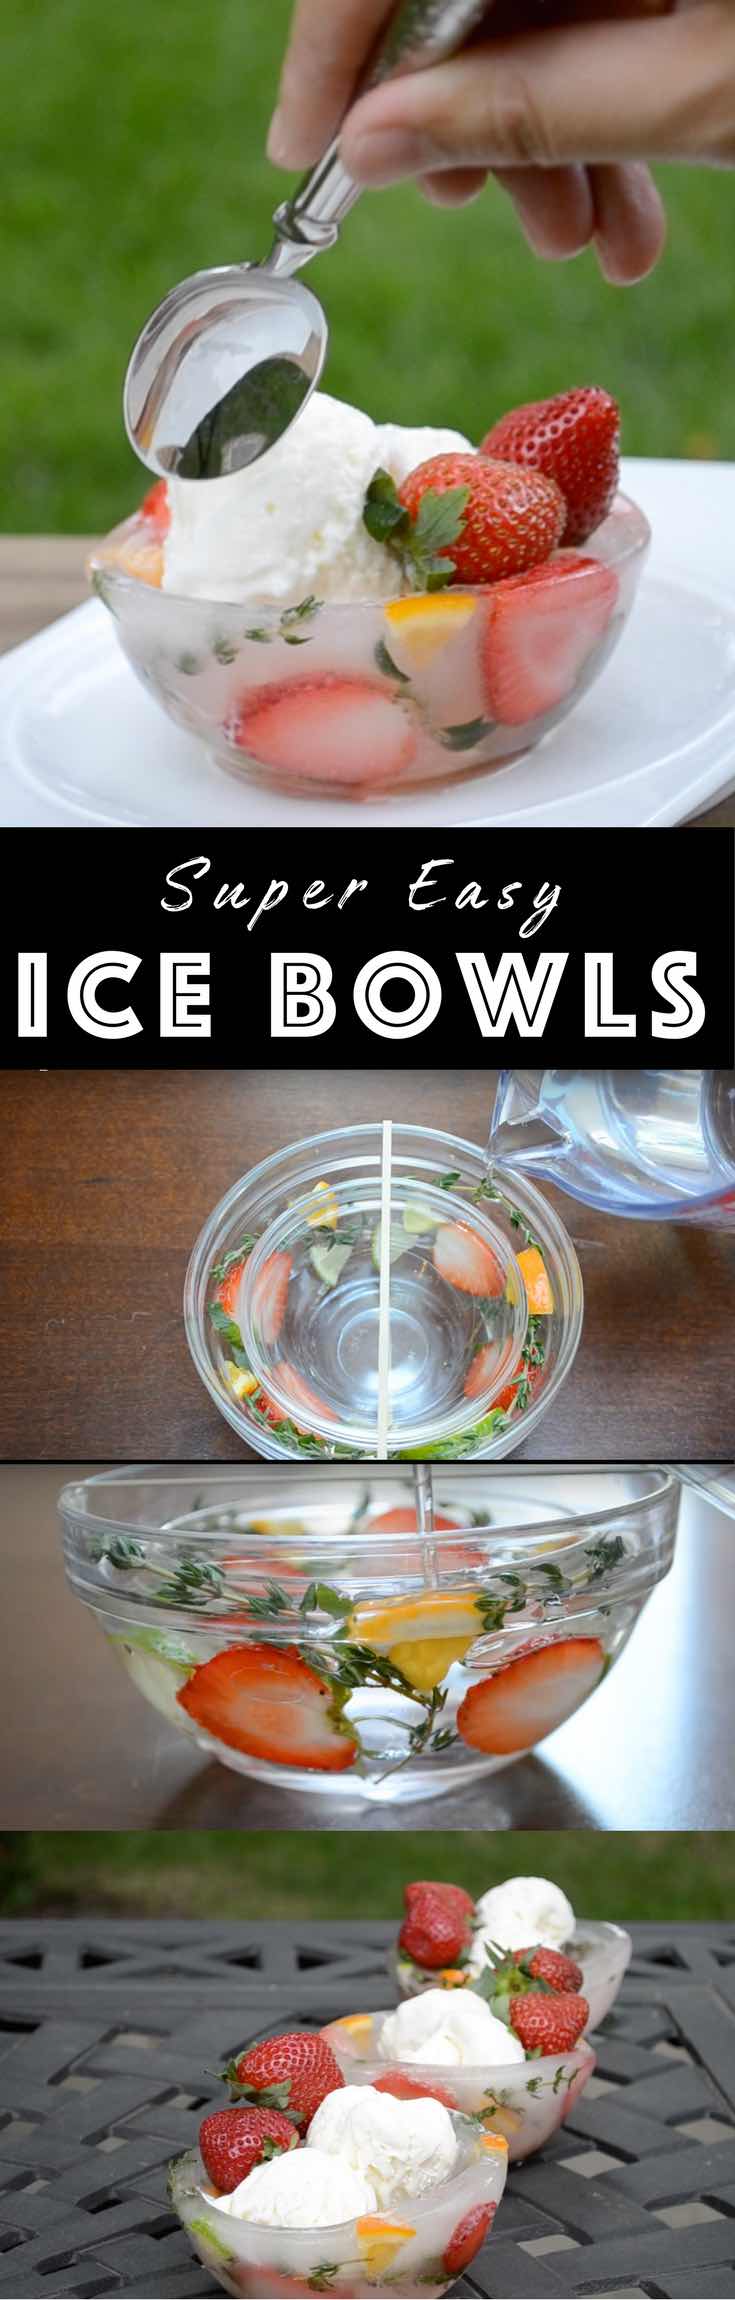
To make one, you’ll need two concentric bowls with a 1/2 to 3/4 inch gap in between. I usually use a 1 quart glass mixing bowl and a 2 1/2 to 3 quart mixing bowl with the same shape, i.e pyrex mixing bowls. In addition, you’ll need a few stiff rubber bands to hold the bowls in place.
Place the smaller bowl inside the larger one. Fasten with rubber bands and then slide any decorations in between. Now pour the water to fill to 1/4-inch below the rim of the bowls to allow for expansion during freezing.
Freeze for 6 hours or more until solid. Unmolding is easy by running hot tap water along the mixing bowls to loosen. Don’t worry – the ice bowl will not disintegrate during this process, as it’s rock solid! Keep the ice bowl frozen until serving.
Watch Video Tutorial
Watch this video tutorial to see how to make an ice bowl:
More dessert bowls:
How to Make an Ice Bowl
Ingredients
- 3 cups cold water, distilled or filtered water recommended
Decorations (optional)
- orange slices, or lemon slices or sliced strawberries
- fresh thyme, or fresh rosemary
Instructions
- Set aside a 1-quart bowl and a 2 1/2 - 3 quart bowl. When the smaller bowl is placed inside the larger one, there should be a 1/2-3/4 inch gap.
- Fasten the bowls together with two stiff rubber bands. This step prevent the inner bowl from floating up when the water goes in.
- Insert the optional decorations into the gap between the bowls, arranging them to your liking.
- Put the cold water into a measuring cup with a spout. Slowly dribble water in between the bowls until it comes up to 1/4-inch below the rim.
- Freeze for 6 hours or more until the bowl has fully solidified.
- To unmold, fill the inner bowl with hot tap water. Wait 10 seconds or more and then lift it out. Then turn the outer bowl upside down and run hot water on top (holding the ice bowl in place with your fingertips to avoid dropping it). After a few seconds, the ice bowl will slide out. Keep the ice bowl frozen until serving.
Notes
- Water: If you use tap water or spring water, the bowl will have a cloudy look. If you use filtered water or distilled water, the look will be more clear.
- Multiple Bowls: If you'd like to make multiple ice bowls at the same time, this can be easily done as long as you have multiple sets of mixing bowls for molding.
- Make Ahead: You can make ice bowls weeks ahead of time, storing in a airtight container to minimize freezer burn. Most decorations will discolor after several days, although orange slices and lemon slices will last up to one week.
Please read our nutrition disclaimer.
Recipe tools:
- Mixing bowls
- Rubber bands
© TIPBUZZ. Images and text on this website are copyright protected. Please do not post or republish without permission. If you want to republish this recipe, please link back to this post. This post may contain affiliate links. Read the disclosure policy here.