Stained Glass Cookies
This post may contain affiliate links. Please read the disclosure policy.
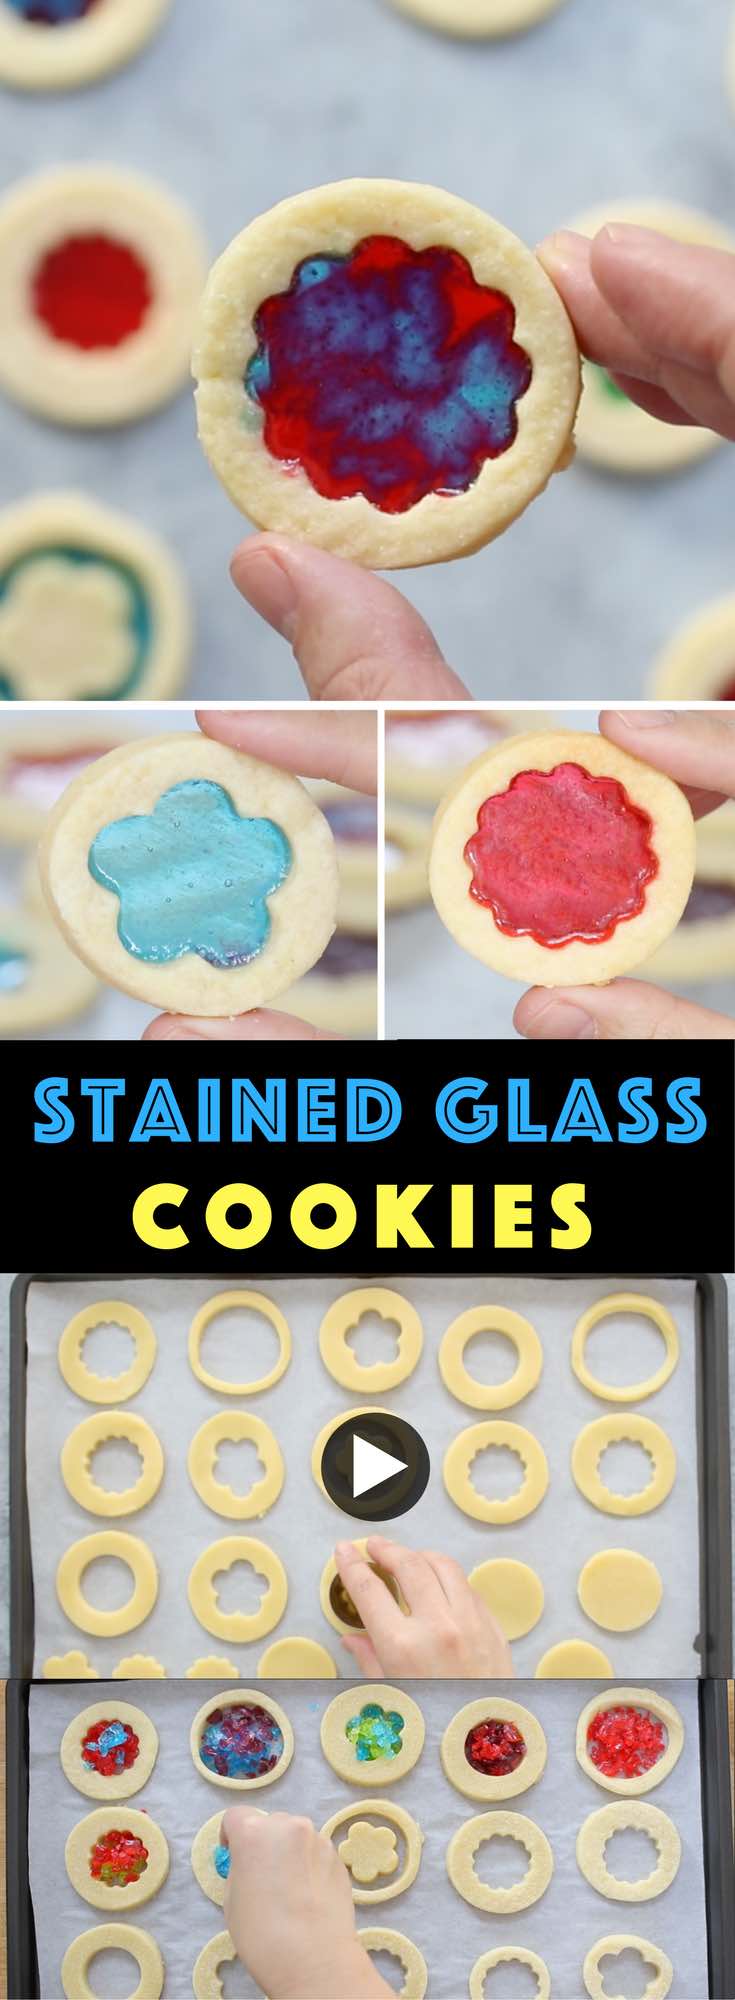
These Stained Glass Cookies are a classic holiday recipe with endless shape and filling options! Delicious buttery sugar cookies are cut into festive shapes and filled with your favorite hard candies. They’re perfect as decorations as well as DIY gift ideas!
These stained glass cookies are my favorite Christmas cookies along with Thumbprint Cookies, Gingerbread Cookies, and Jammie Dodgers. They’re easy to make and incredibly delicious. Plus, they’re so much fun as decorations!
To make these stained glass cookies, you’ll need:
- Hard Candies: Jolly rancher candies are my favorite.
- Flour: All-purpose flour works best for getting light-colored cookies.
- Butter: Use unsalted butter and soften to room temperature.
- Cream Cheese: This secret ingredient makes sugar cookies richer and softer.
- Egg Yolks: They add richness while binding the ingredients together.
- Sugar: I use white granulated sugar instead of brown sugar for a lighter colored dough.
- Vanilla Extract: Adds a complex flavor and aroma to the cookies.
For stained window glass cookies, the dough needs to hold its shape during baking. My sugar cookie dough recipe has the right ratios to ensure the cookies don’t expand too much, leaving just enough space for the melted candies in the center. Avoid store-bought dough as the cookies tend to spread too much!
Another special thing about this recipe is that I add cream cheese to the dough, which changes everything! The cream cheese produces a richer and creamier sugar cookie with a slight tang that’s so irresistible! Here’s how to make these delicious cookies:
Beat the dough: Using a stand mixer or hand mixer, beat the softened butter, cream cheese, and sugar together on medium speed until fluffy. Add the egg yolk and vanilla, beating until combined. Then gradually add the flour and beat on low speed until just combined.
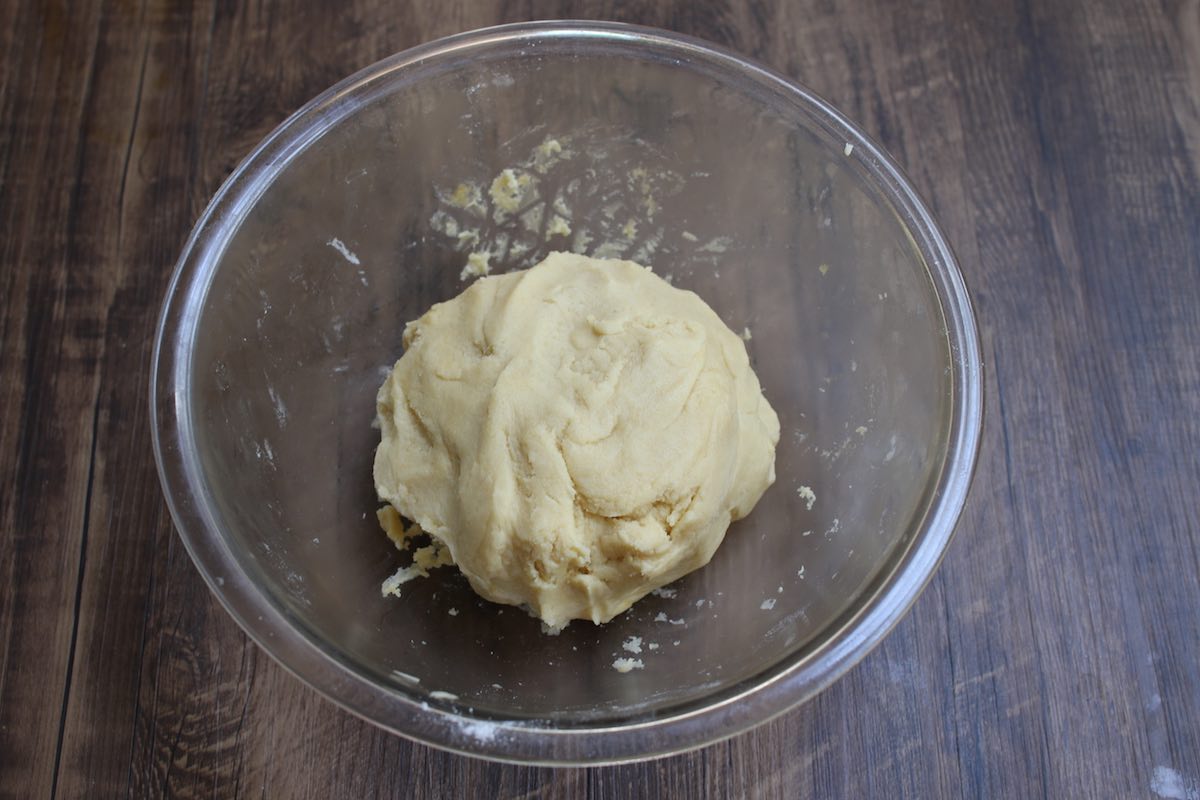
Chill the dough: Gather the dough into a ball shape, and flatten the ball into a 1-inch thick disk, wrap in plastic wrap. Chill for 30 to 60 minutes in the fridge.
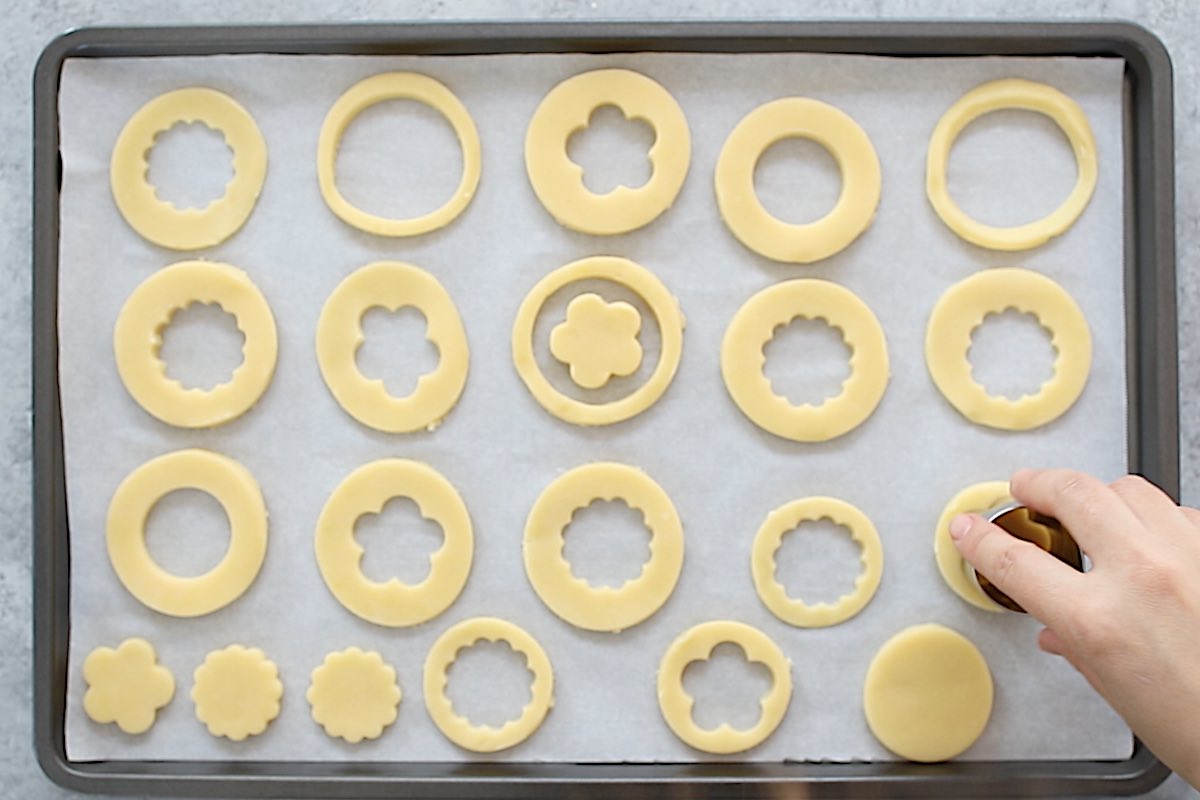
Roll and cut the dough: Once the dough is chilled, remove it from the fridge and unwrap. Place on a lightly floured surface and roll it out evenly to approximately 1/8-inch (3 mm) thick. Use cookie cutters to cut out your desired shapes, re-rolling the dough as needed to cut out more.
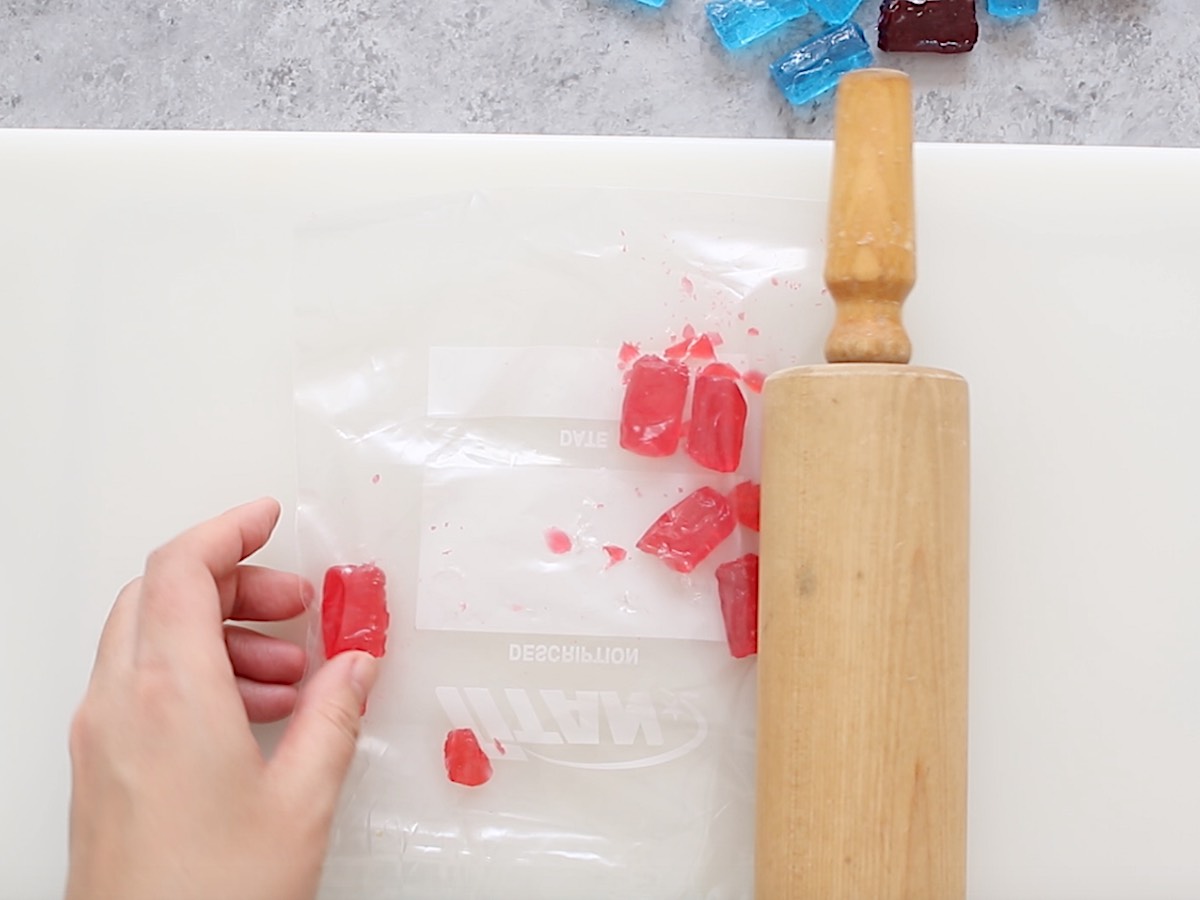
Crush jolly rancher candies: While your dough is chilling, unwrap your hard candies and place each color of candy into separate small ziptop bags. Crush by pounding gently with a rolling pin.
Bake: Transfer the cut cookie dough to a parchment-lined baking sheet. Bake at 375°F (190°C) for 6 minutes and remove from the oven.
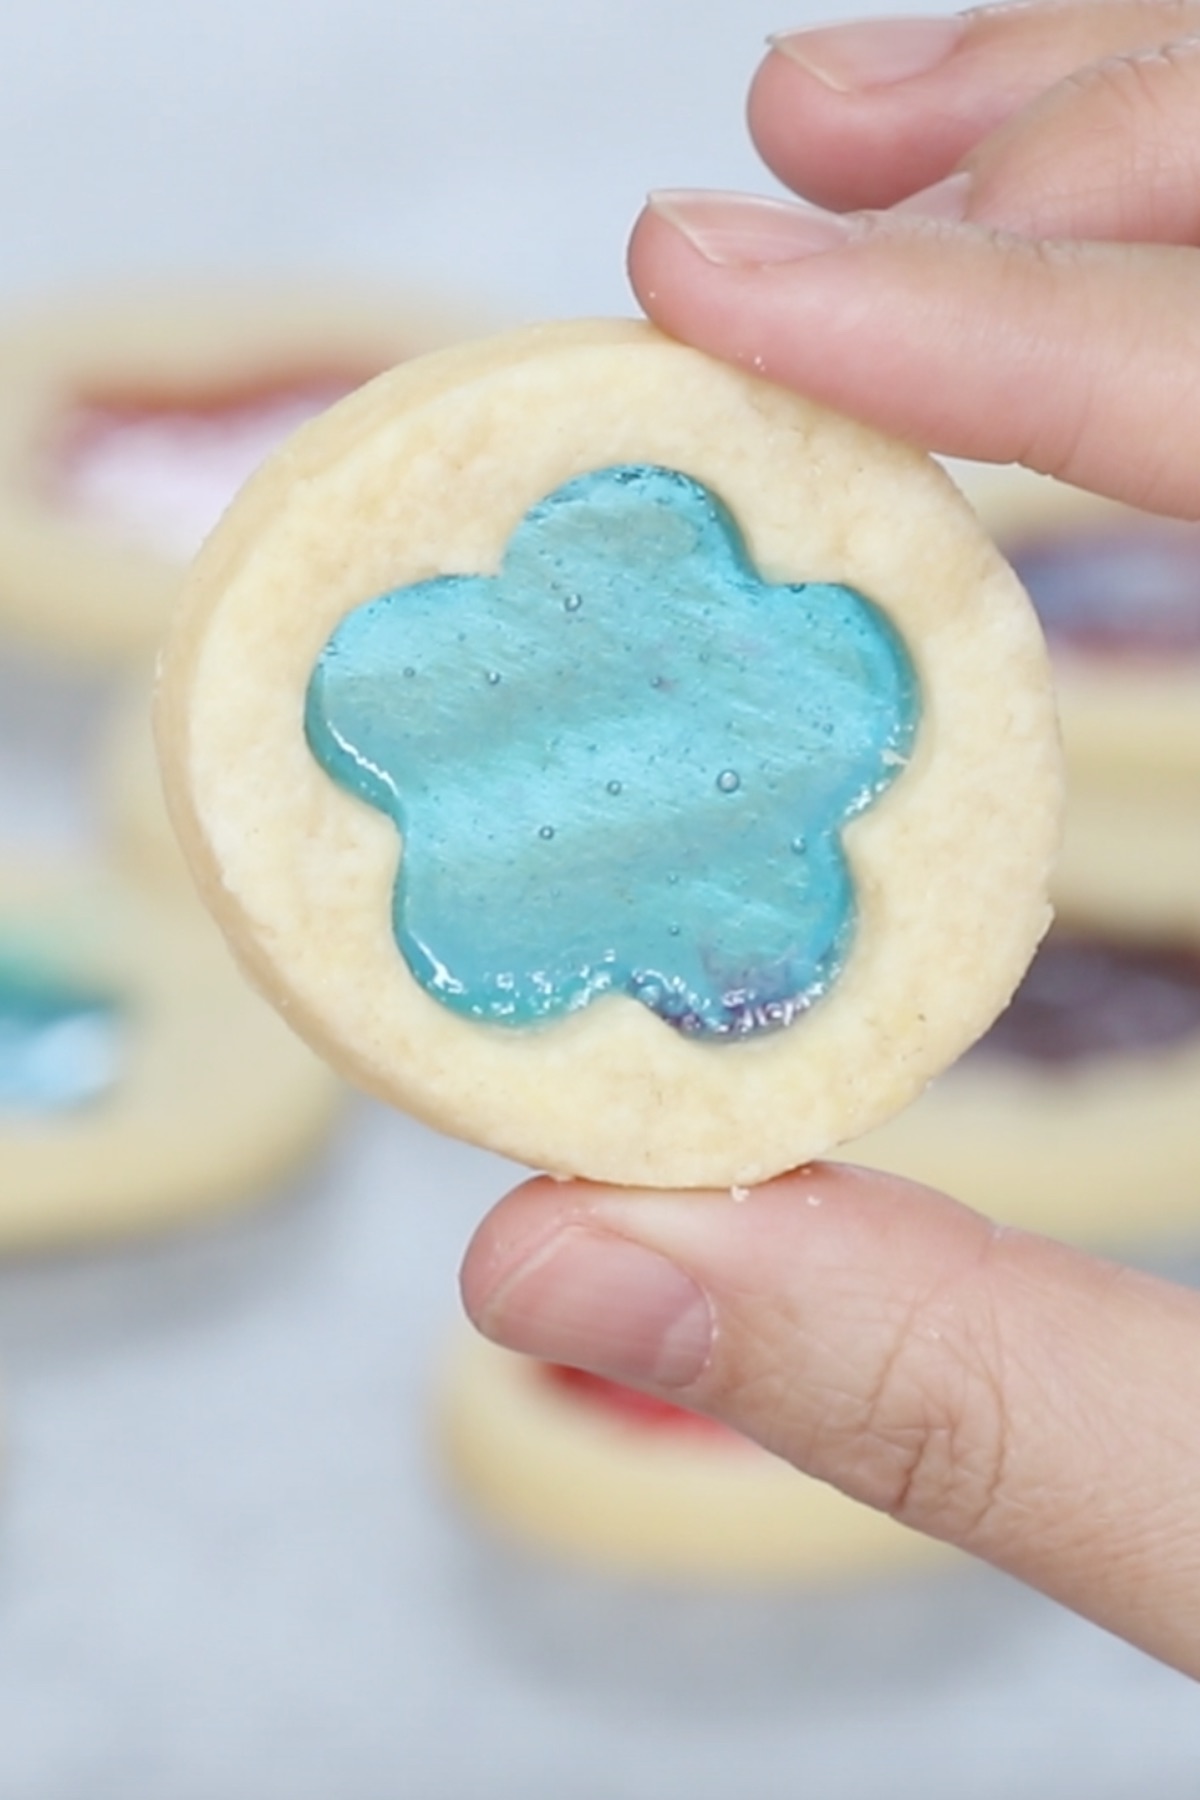
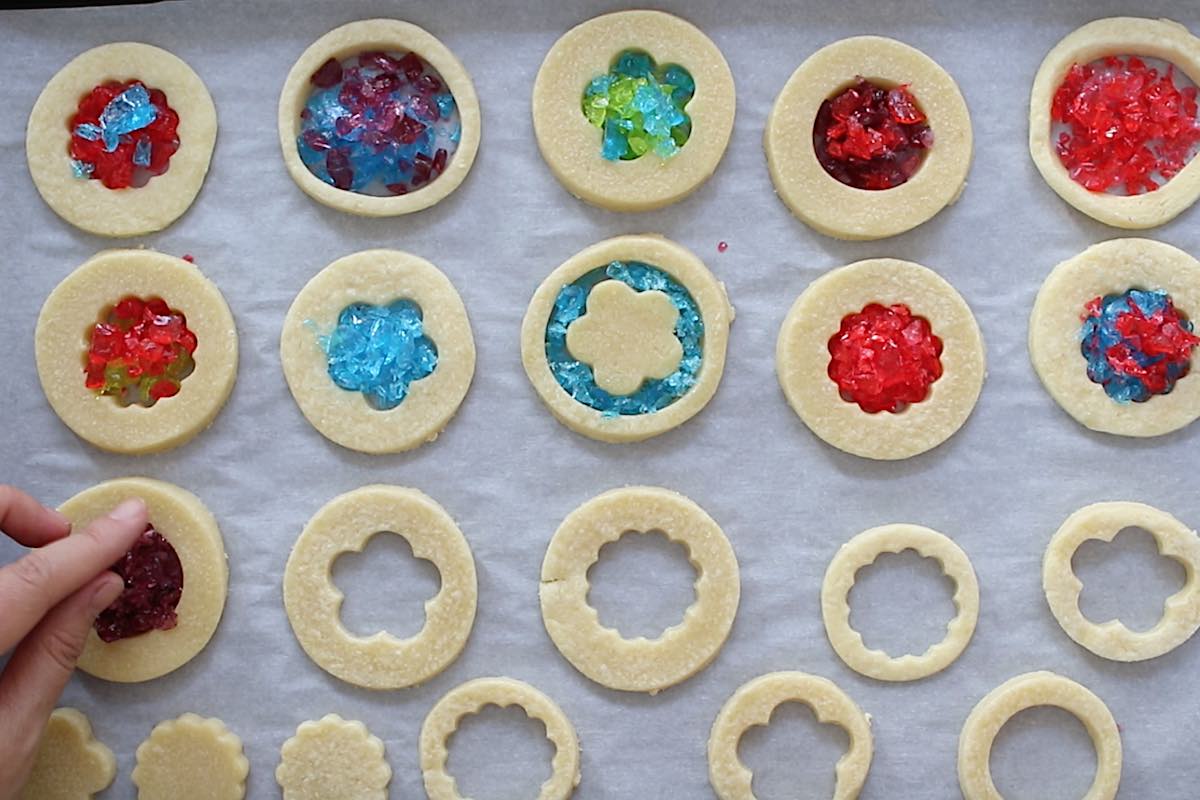
Fill the centers with crushed candy: Feel free to use your preferred colors or you can combine different colors (see below).
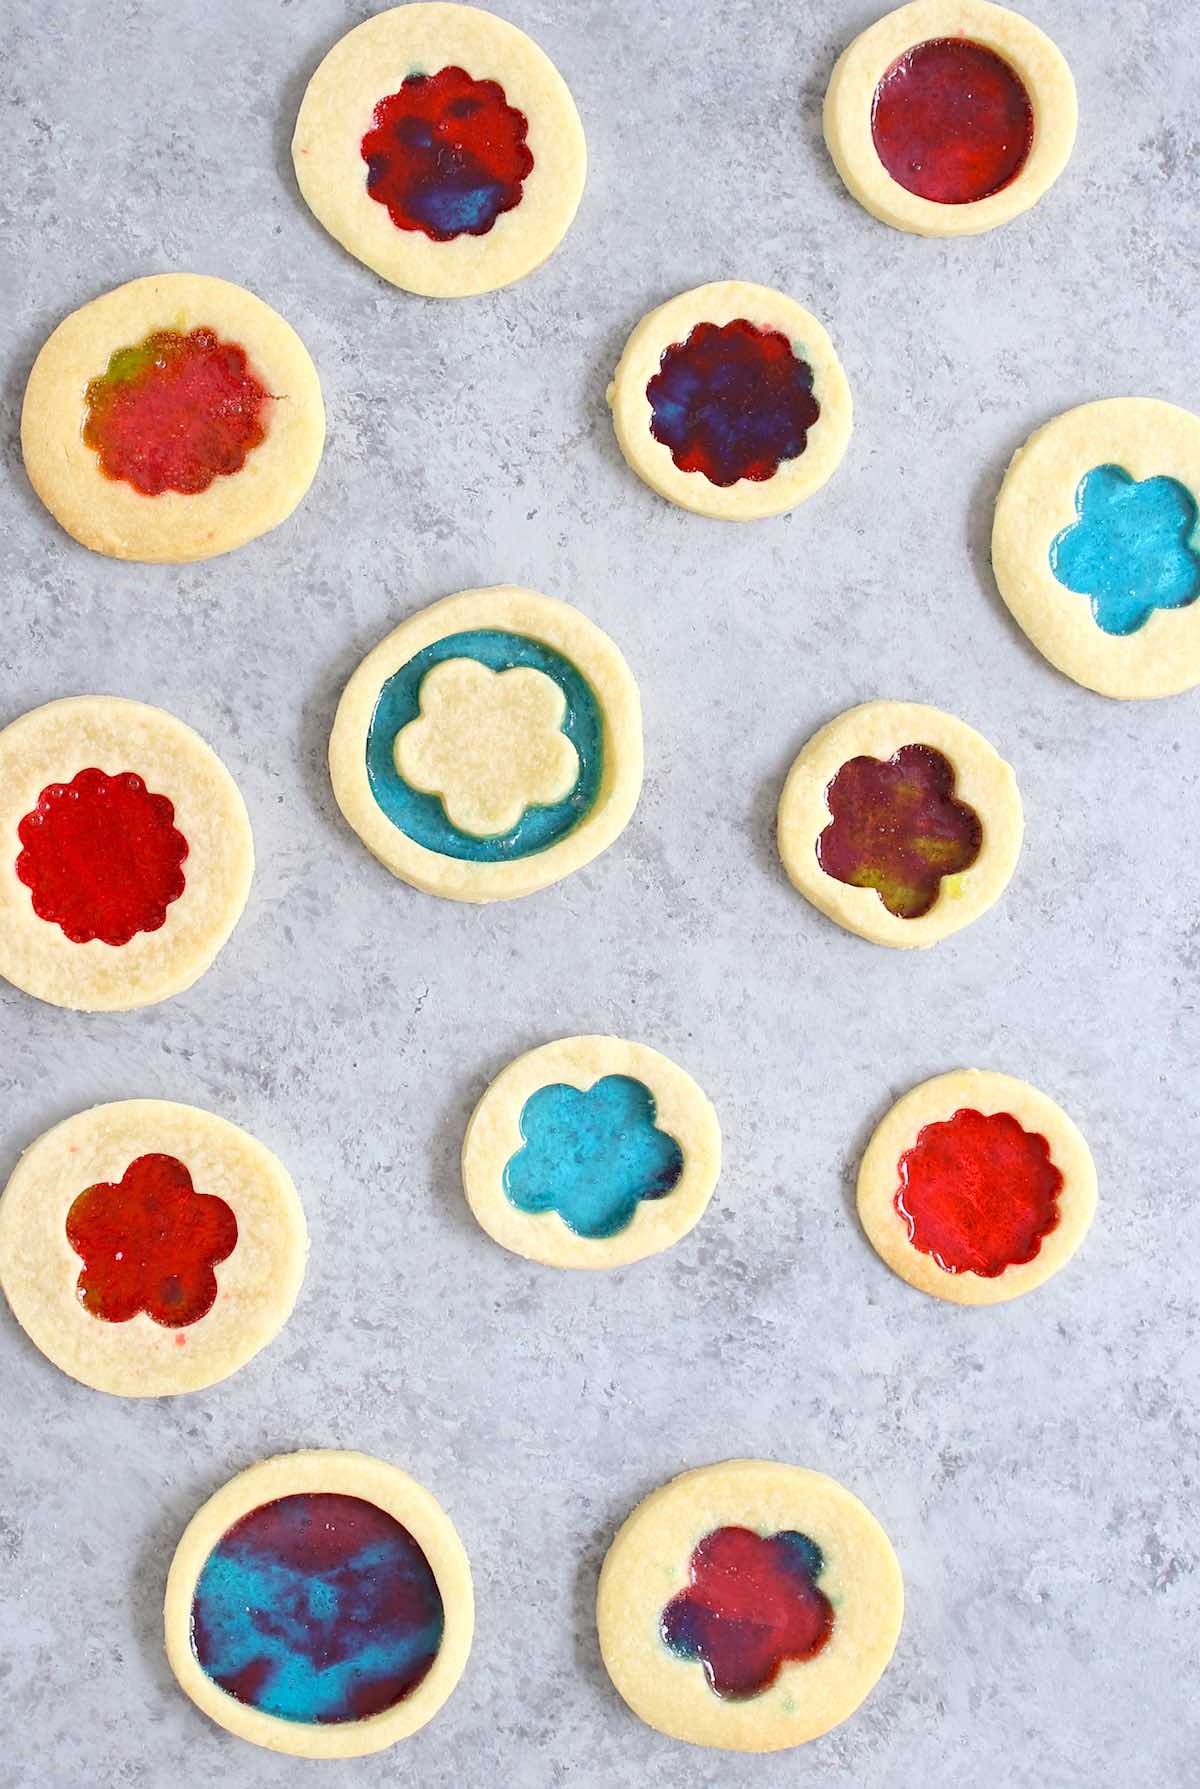
Bake again: Bake for 4-5 more minutes until candy has melted. Let them cool on the baking sheet until the candies have hardened.
Jolly ranchers are the best candies to use for this recipe. You can use other hard candies such as Life Savers, but they won’t be as beautiful and clear as Jolly Ranchers.

Once your dough is 1/8-inch thick, cut the dough into shapes with cookie cutters (see the photos above for some ideas). You’ll need different, smaller cutters to “cut out” windows within the cookies. You can make hearts, stars or Christmas trees. The possibilities are endless!
- Crush the candies: You need to crush jolly ranchers into small pieces instead of fine powder, otherwise, they won’t melt properly. (Watch the video to see how to do this.)
- Fill the center of cookies: It’s best to fill the center all the way full but not overflowing. The candies will shrink when melted.
- Add the candies when the cookies are half baked: It takes the cookies longer time to cook than to melt the candies. So you need to half-bake the cookies before adding the crushed candies.
More fun variations
- Gummy bear stained glass cookies: You can use gummy bears instead of hard candies, but you need to bake the cookies for 8 minutes before adding the gummy bears and baking for 2 more minutes.
- Make them into stained glass ornament cookies: Poke a hole at the top of the cookies using a straw before baking, so you can tie with a ribbon to hang on a Christmas tree.
- Adding sprinkles: You can add sprinkles to the cut cookie dough before baking to make the cookies even more festive.
Yes, you can freeze the raw dough as well as baked stained glass cookies. For the dough, wrap with parchment paper and store it in a sealed ziptop bag. For the cooked cookies, layer with parchment or wax paper in between so they don’t stick to each other. They can last for up to 3 months in the freezer.
More Christmas Treats:
Stained Glass Cookies (+ Video)
Ingredients
- 20 Jolly Rancher candies, or other hard candies such as Life Savers*
- 1 cup unsalted butter, softened
- 1 oz cream cheese, softened
- 3/4 cup sugar
- 2 egg yolks
- 2 teaspoons vanilla
- 2 1/2 cups all-purpose flour, plus more for dusting
Instructions
Make Sugar Cookie Dough:
- Using a stand mixer or hand mixer, beat the softened butter, cream cheese, and sugar together on medium speed until fluffy (about 2 minutes).
- Add egg yolk and vanilla, beat until combined (about 1-2 minutes).
- Gradually add the flour and beat on low speed until just combined (2 minutes).
- Using your hands, gather the dough into a ball and flatten to a 1-inch thick disk.
- Wrap in plastic wrap and chill for 30-60 minutes or as long as 1 day.
- Remove from the fridge. Unwrap and place it on a lightly floured surface.
- Roll out the dough evenly until it is approximately 1/8-inch thick. Use cookie cutters to cut out your desired shapes (You can re-roll the leftover dough as needed and re-cut. )
Make Stained Glass Cookies:
- Preheat oven to 375°F (190°C). Line a baking sheet with parchment paper and set aside.
- Unwrap the hard candies. Place each color into a separate ziplock bag, seal and crush into small pieces* by pounding gently with a rolling pin.
- Transfer the cut cookie dough to a parchment-lined baking sheet. Bake for 6 minutes and remove from the oven.
- Fill the centers of the cookies with crushed candies so they’re full in the center but not overflowing (remember the candies will shrink when baked). You can use a single color or combination for each cookie.
- Bake for another 4-5 minutes until the candy has melted.
- Let the cookies cool on the baking sheet until the candies have hardened completely.
Notes
- *Don’t crush your candies into powder, or they won’t melt properly.
- You can store these cookies at room temperature for 2-3 days. Make sure to store them in a single layer or place parchment in between layers to prevent them from sticking.
Please read our nutrition disclaimer.
Editor note: Published December 17, 2016 and updated Oct 28, 2019
© TIPBUZZ. Images and text on this website are copyright protected. Please do not post or republish without permission. If you want to republish this recipe, please link back to this post. This post may contain affiliate links. Read the disclosure policy here.


My kids love making these. They are so fun and so pretty, too!
Hi Allison, So happy to hear that and hope you have a wonderful holiday season!
This recipe is AMAZING!! I made some delicious bikkies off of this recipe! SO GOOD. Everyone loved these bikkies, and they are easy to make – win win!
Hi there, So happy to hear that! Thanks for your comment and glad you enjoyed! 🙂
My dough is dry and crumbly and won’t hold together in the slightest. When the recipe says to put in egg yolks you DO mean JUST the yolks, right? That’s the only thing I can imagine that would leave this so dry. Help!
Hi Emily, Thanks for your comment, and not to worry! It should be JUST the yolks. If it’s too crumbly, wrap in parchment and put in a ziptop bag in the fridge for 3-4 hours and that should help. All flours behave a bit differently alas. Good luck!
I showed my grand daughters how to make these,I don’t know who had more fun,my babies did a great job.
Hi Robin, It’s definitely a great activity for kids – thanks for your comment and happy holidays! 🙂
Ameiiii PARABÉNS pela criatividade👏👏👏👏
Thanks you Iris 🙂
So, mine can’t be cooled on a wire rack, the candy is hot and not solid yet. DId I do something wrong?
Should be just fine Gay. When the cookies cool the candy will harden 🙂