Hash Brown Happy Egg Nests
This post may contain affiliate links. Please read the disclosure policy.
This post is sponsored by the Happy Egg Co, all opinions are my own.
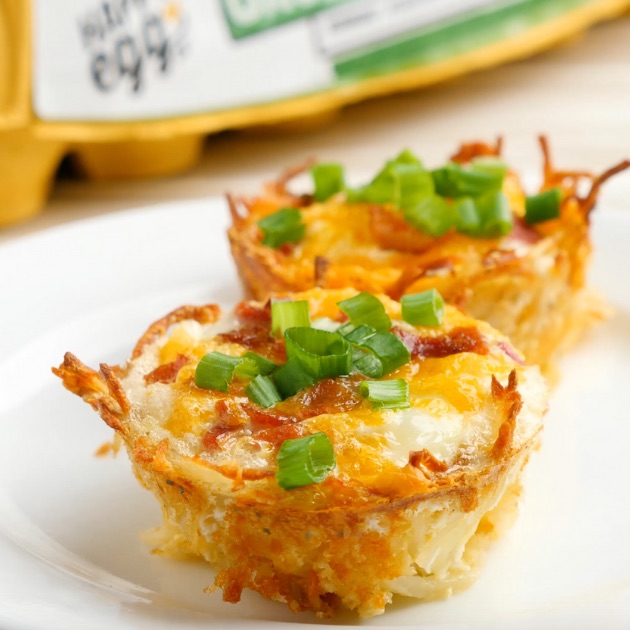
Hash Brown Egg Nests are a delicious breakfast or brunch idea you can make ahead. They’re soft on the inside, and crispy golden on the outside. They’re great for a quick weekday breakfast, and also perfect for feeding a crowd. Plus, video tutorial!
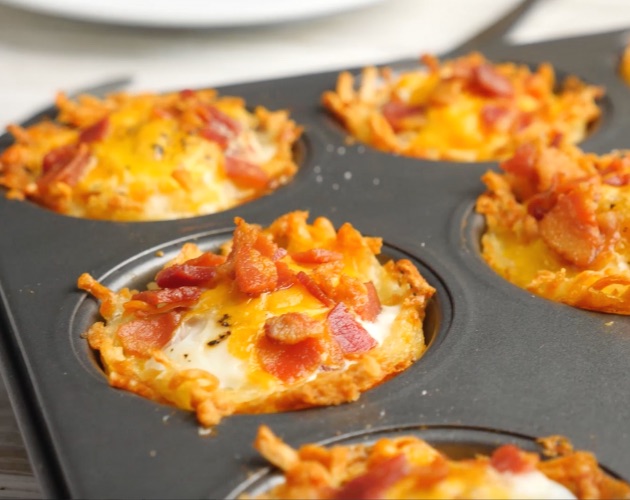
This Happy Egg nest recipe is one of our all-time favorite breakfast ideas! Hash browns are packed into a muffin pan and filled with farm-fresh Happy Eggs, bacon and cheddar cheese to make crisp nests. You can’t go wrong! We try to keep a dozen on hand in the freezer for hectic weekdays or holiday entertaining.
While egg nests make a nutritious grab-and-go breakfast, we’ve served them to rave reviews during holidays, Mother’s Day, Father’s Day and Easter. Even those picky eaters love them. Simply pair them up with some avocado, baked beans, hot sauce (you name it!) for a scrumptious start to the day!
Selecting Eggs for Egg Nests
For a standard size muffin tin, large eggs work best. I always recommend free-range or organic whenever possible, and I’m not just talking about the usual marketing. If you want maximum flavor and nutritional benefits of eggs, then find the story behind the label.
That’s why we’re huge fans of Happy Egg Co, whose motto is “we love our birds so you can feel good about your eggs.” Their hens forage freely in over 8 acres of outdoor pasture on small family-owned farms in the Ozark Woodlands of Missouri and Arkansas. That’s a lot better than eggs coming from cages and even cage-free, where hens have less than 2 square feet of space and no outdoor access.
The result? When you crack an egg into your skillet, the yolks stand tall and proud. Pancakes and baked goods are moister and fluffier with that fresh barnyard flavor we all crave. Check their store locator to find a local store in your area.
How to Make Hash Brown Happy Egg Nests
You only need a few simple ingredients to make Hash Brown Egg Nests:
- Happy Eggs: Free-est of the Free Range or Organic Free-est of the Free Range
- shredded hash browns
- shredded cheddar cheese
- olive oil
- cooked bacon, crumbled
- salt & pepper to taste
If you have leftover baked potatoes, just peel and coarsely grate them to use as a substitute for hash browns. The flavor is often superior with real potatoes, even though they’re less convenient.
You can always customize by adding in your favorite toppings like bell pepper, cilantro etc. We’ve included some optional chopped green onion or parsley for garnish.
Tips for Making Hash Brown Happy Egg Nests
- If the hash browns are limp or soft, dry between sheets of paper towel to remove excess moisture before using to prevent getting a soggy crust.
- To avoid flavors being too salty, use grated potato instead of hash browns and use reduced sodium bacon.
- To save prep time, buy pre-cooked crumbled bacon instead of frying your own.
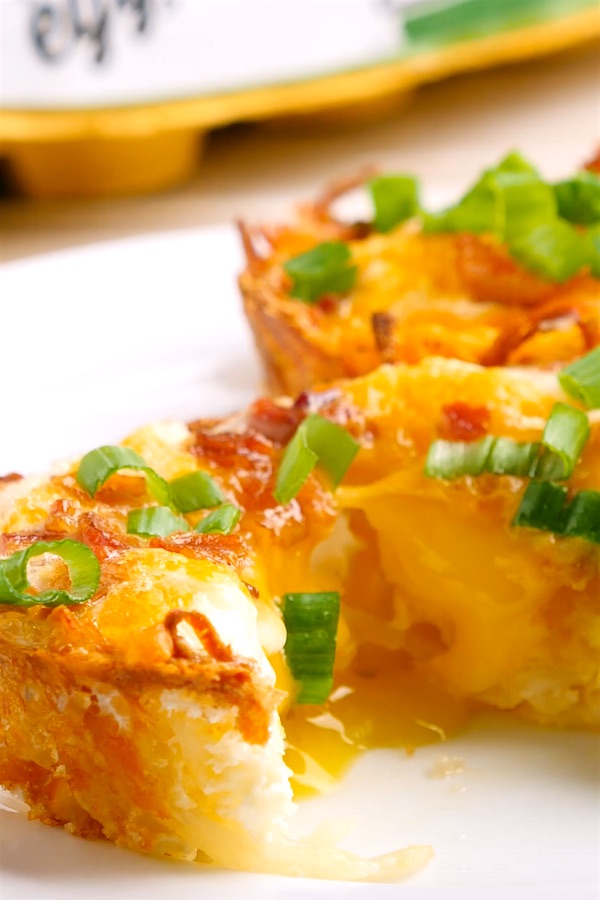
- The eggs will keep cooking for one more minute out of the oven, so remove them when they still have a slight jiggle unless you prefer a solid yolk.
To make these ahead of time, store the baked nests in an airtight container or sealed ziptop bag for up to 4 days in the fridge, or 1 month in the freezer. To reheat, simply pop them in the microwave.
Watch How to Make Hash Brown Happy Egg Nests
Hash Brown Happy Egg Nests (with Video)
Ingredients
- 12 large Happy Eggs
- 20 oz shredded hash browns, thawed or grated potato (see note)
- 1 ½ cups shredded cheddar cheese, divided
- 1 tablespoon olive oil
- 3 slices bacon, cooked and crumbled
- salt & pepper, to taste
- green onion, minced, for garnish
Instructions
- Preheat oven to 425°F. Grease a 12-cup muffin tin.
- In a medium bowl, mix hash browns, 1 ¼ cup cheddar cheese and olive oil.
- Divide hash brown mixture into muffin tin, using fingertips to press into the shape of each cup.
- Bake until the edges have browned, about 12-15 minutes.
- Crack one egg into each muffin cup. Season with salt and pepper.
- Sprinkle remaining ¼ cup cheddar cheese and crumbled bacon on top.
- Lower heat to 350°F and bake 15 minutes more until the egg whites have set.
- Remove from oven and allow to cool for several minutes.
- Lift out of the pan by sliding a knife or offset spatula around the edges.
- Garnish with optional green onion. Serve and enjoy!
Notes
- To parboil a potato, boil a medium baking potato for 15 minutes. Alternatively, you can wet it, prick several times with a fork, wrap in a paper towel and microwave for 5 minutes.
- If the hash browns are limp or soft, dry between sheets of paper towel to remove excess moisture before using to prevent getting a soggy crust.
- The eggs will keep cooking for one more minute out of the oven, so remove them when they still have a slight jiggle unless you prefer a solid yolk.
- To avoid flavors being too salty, use grated potato instead of hash browns and use reduced sodium bacon.
Please read our nutrition disclaimer.
© TIPBUZZ. Images and text on this website are copyright protected. Please do not post or republish without permission. If you want to republish this recipe, please link back to this post. This post may contain affiliate links. Read the disclosure policy here.




I made these for the Preschool I work for. Used the scrabbled egg idea to help on cost (85 children to feed). They LOVED this! Thank you
Hi Sandy, So heartwarming to hear that and thanks for leaving a comment!
Great recipe. Family loved it. Any suggestions to make cleanup easier?? It was the worst. I sprayed pan but scrubbed them for hours. That’s the only reason for 4 stars
Hi Lyn, Thanks for your comment and glad you enjoyed them! If you’re having sticking issues then it’s best to use paper cupcake liners as some of those nonstick sprays are still insufficient with eggs. I’ll add a note to the recipe.
Love this recipe! I altered it a little but still came out perfect! I used a cupcake tin so there was a little less space for everything.. also I think my ingredients were measured slightly off so to fit everything, I scrambled the eggs(used 6 eggs) and it was the perfect amount for me. (I did this because I knew a whole egg probably wouldn’t fit). Everything else as the recipe instructed and popped in the air fryer this morning to reheat. P E R F EC T. Thank you for this recipe!
Stefani, Thanks and so glad to hear. The reheating in the Air Fryer is a great idea too!
Love this idea can you freeze these
Hi Nancy, Thanks and yes, you certainly can! 🙂
I substituted meatballs (with a cube of mozzarella inside), for the eggs … oh, yum!!
Hi Christine, Thanks for your comment and glad you enjoyed!
Oh my! I love this idea for breakfast! Thanks for sharing.
Thanks Suzy, hope you try it soon 🙂
These are adorable! I need to make this with my kiddo for Easter.
Hi Abeer, Thanks for your review and let me know how it goes! 🙂